
Tuesday, December 28, 2010
Monday Makeup #2 - Who Says Green Means Jealousy? Makeup Look
Hey guys! I'm coming back again with another tutorial, and the only reason why I'm coming back so soon is because I'll be gone for the weekend and I won't have access to all of my stuff (I don't even know if I'll have time to blog!) so I'm just going to get this up onto my blog and then it'll be ready for next Monday. Mmm, I suddenly smell yummy deliciousness...
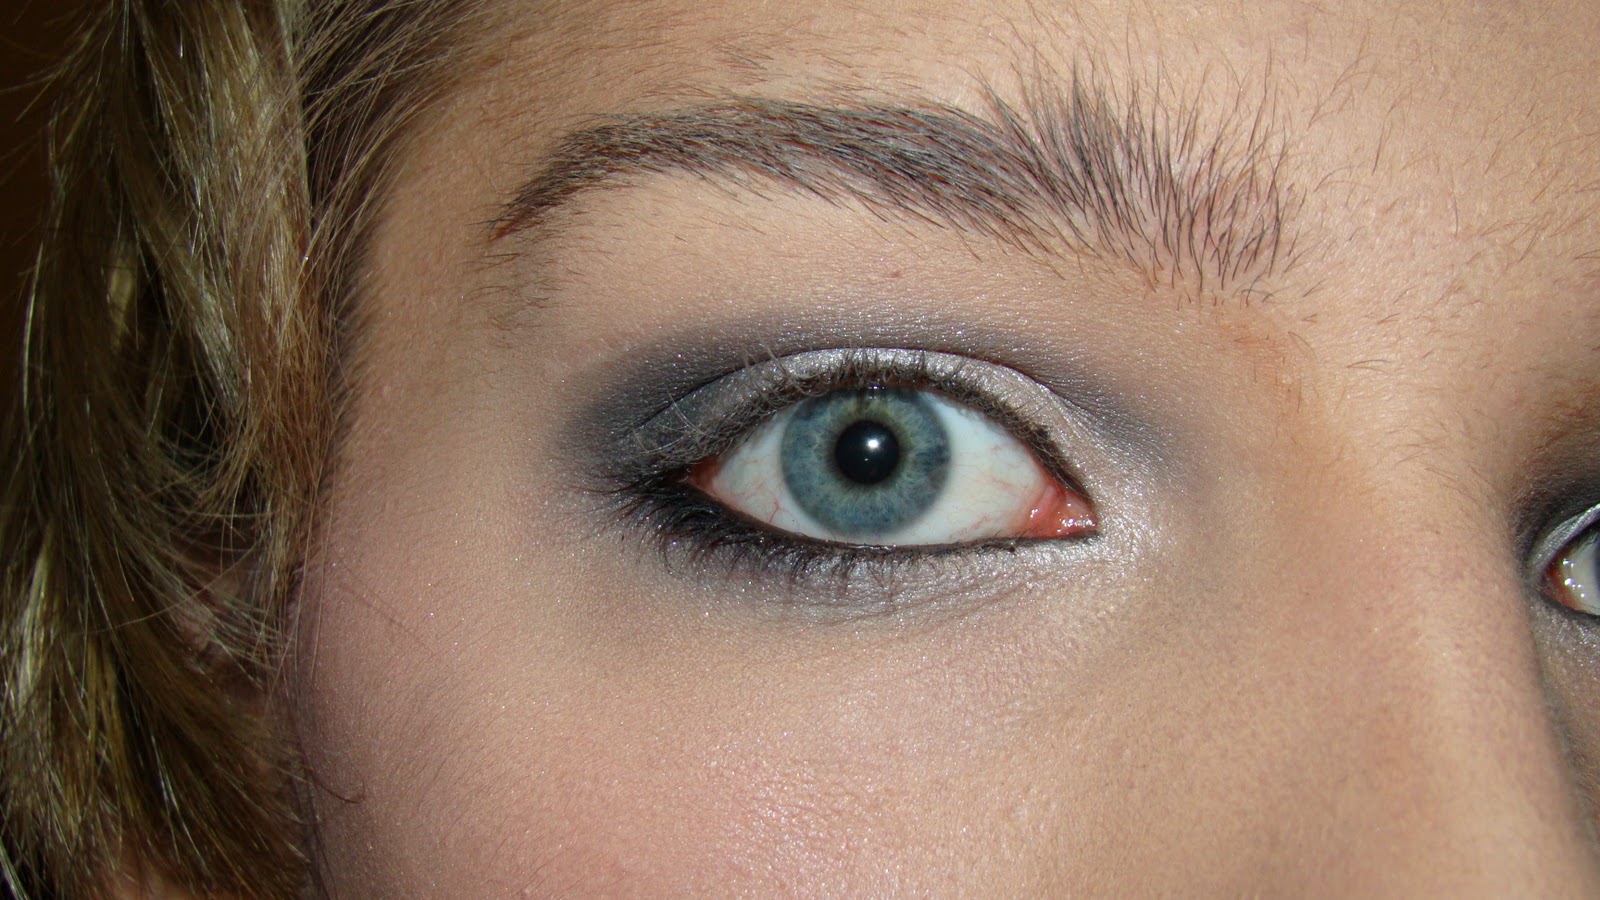
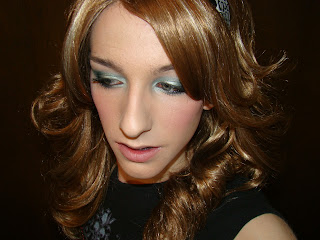 All right, so as you can see in the picture above this look is a very pretty smokey-like green look. I've known ever since I was about 14 that green does not look good on me whatsoever. But when I was applying a specific green eyeshadow from my 120-color palette for a makeup look on my Youtube page, I fell in love with the color and had to do a whole look just based from this one color. So, without further adieu, let's get to the tutorial!
Now, I first have to admit that nothing was really going right for me when I was taking the pictures today. I didn't realize that my camera battery was running low and next thing I knew, the thing was literally dying in my hands ... which wasn't as tragic as it sounds. So I'll try my best to make sure you guys understand what I'm trying to direct you to do.

So as pictured here I've already got all of my foundations and powders on. Both the liquid and cream foundations, as well as the pressed powder, are by Revlon: the thin layer of liquid is Revlon's ColorStay foundation and the cream foundation, which I've applied on top of the liquid foundation, is Revlon's OneStep mineral foundation, with a foundation brush. I then applied a generous amount of Revlon's translucent powder over top of the foundation, using a bronzing brush to "stamp" the translucent powder on. I applied my Rimmel bronzer with a different bronzing brush at my temples and about an inch under my natural cheekbones, darkening the cheeks, my chin and my jaw line, and also applied it on my neck. The blush, by Hard Candy (which you buy at Walmart now), I applied on my cheekbones with a medium powder brush and the apples of my cheeks. (Yes, I did copy-and-paste this paragraph from the last post. Fun stuff!)


So first what I decided to do is to prime my eyes with Rimmel London's creme shadow... I'm not to sure what this one is, it's a grey one -- anyway, I recommend you NOT do this as the look began to crease (meaning the powders started slipping into a thin line where my lid rested when my eyes were open) as I was still working on the look. Instead, I recommend using Bloom's eye base/primer (which you can buy at London Drugs) or using a matte white cream shadow (Revlon makes a really nice one from their Illuminance palette Black Magic).
Then I used these colors...
 I will tell you now that the greens pictured here (except the one on the very right and the purples) and the second silver from the left I used for this look... I wasn't able to take pictures of the other colors I used (a sparkly white and the sooty-colored silver from the previous blog post) because I was panicking about my camera dying... Sorry! I promise it won't happen again. :c
So anyway, I used the two greens in the center of the picture and used the one on the left (not the pine green one but the one that looks like a little bit of gold was mixed in as well) just on my lid with a medium shadow brush...


And then I applied the green to the right of the goldy-green everywhere else, as pictured below, with a small-medium brush...


Take note that I also applied the shadows on the lower lash line as well.
And now here comes the fun part--creating more depth! This bit is fun in my opinion because you really start to see the look come together.


As pictured above, I took that pine-green color that you see on the very left on the green section and used a small amount with the sooty-colored silver and applied that on the very outer corner of the eye with a small shadow brush.
Just for kicks, I decided to apply the sparkly white in the corner of the eye with a different small shadow brush, as well as just underneath my brow with a large fluffy brush...


As you can also see I added a light silver to the very top of the look, just to give it that gradient effect as well.
Then came the lining of the eyes and mascara! I'm pretty sure this is simple and I don't have to go into too much detail over this. Y'all know how to apply eyeliner and mascara, right?

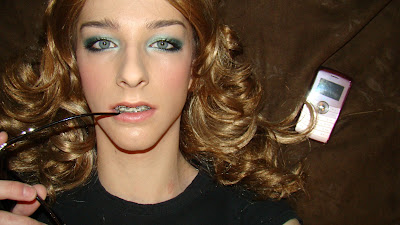
 In these pictures as well, you can see the look creasing already... Pretty sad, eh? Never again, let me tell you. I think I'm going to go throw that stuff out; I hardly use it anyway.
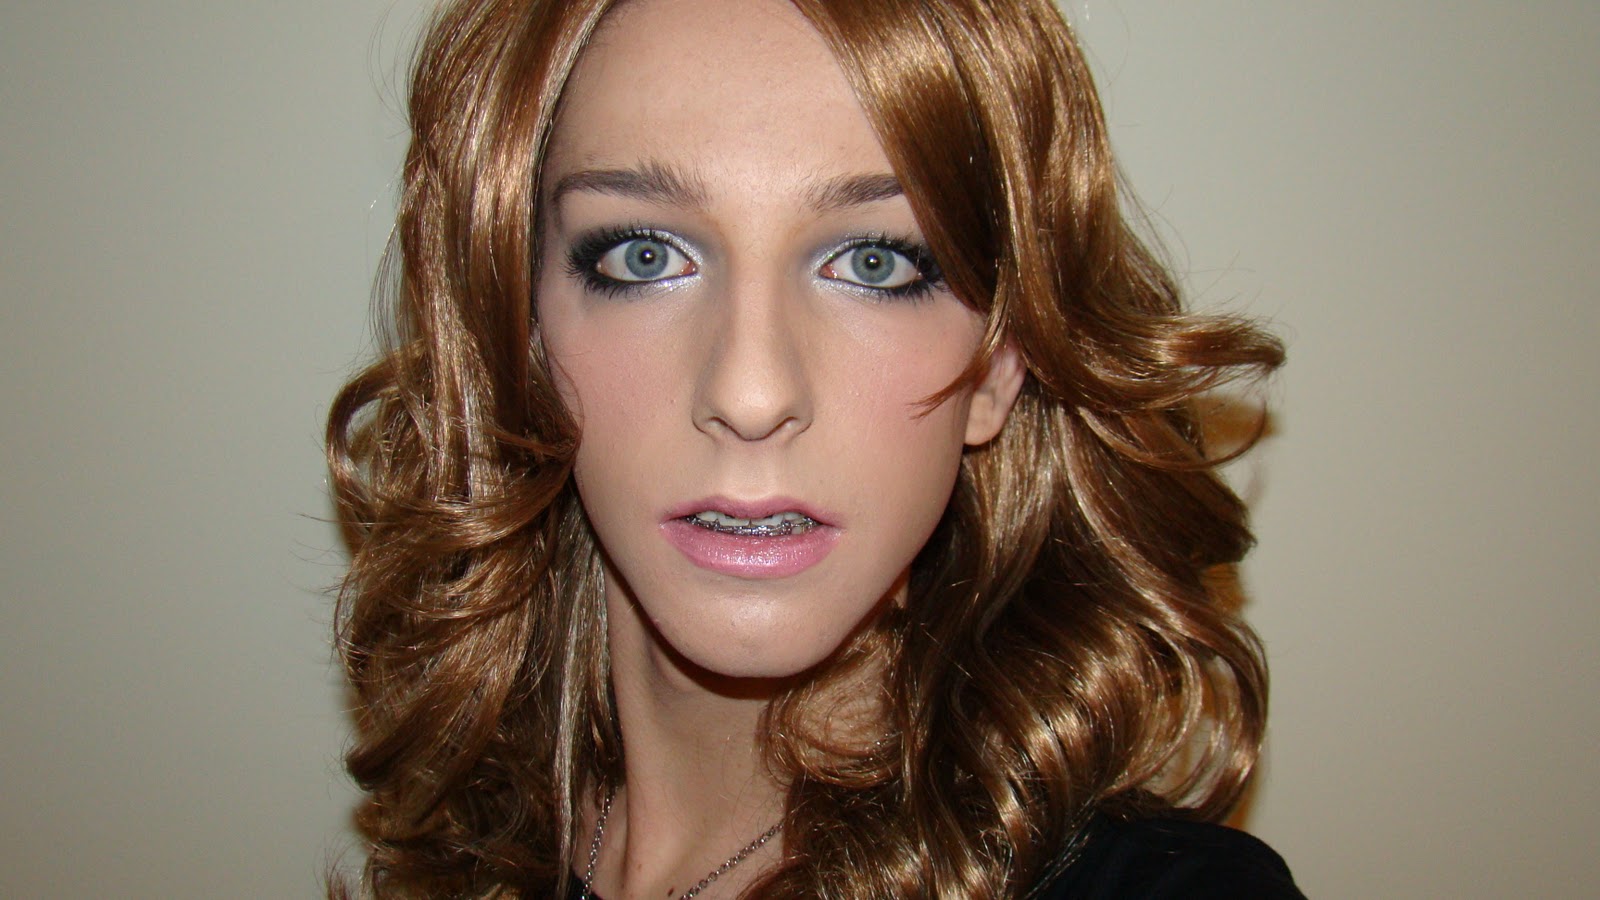
And that's the look! I hope you guys enjoyed and if you have any requests please leave me a comment! I'll get to the look as soon as I can! Somehow I think I'm going to become the next Queen Blogging Bee. More on that later.
Have a gorgeous day! Stay gold!
- Colten.
xoxo

Now, I first have to admit that nothing was really going right for me when I was taking the pictures today. I didn't realize that my camera battery was running low and next thing I knew, the thing was literally dying in my hands ... which wasn't as tragic as it sounds. So I'll try my best to make sure you guys understand what I'm trying to direct you to do.

So as pictured here I've already got all of my foundations and powders on. Both the liquid and cream foundations, as well as the pressed powder, are by Revlon: the thin layer of liquid is Revlon's ColorStay foundation and the cream foundation, which I've applied on top of the liquid foundation, is Revlon's OneStep mineral foundation, with a foundation brush. I then applied a generous amount of Revlon's translucent powder over top of the foundation, using a bronzing brush to "stamp" the translucent powder on. I applied my Rimmel bronzer with a different bronzing brush at my temples and about an inch under my natural cheekbones, darkening the cheeks, my chin and my jaw line, and also applied it on my neck. The blush, by Hard Candy (which you buy at Walmart now), I applied on my cheekbones with a medium powder brush and the apples of my cheeks. (Yes, I did copy-and-paste this paragraph from the last post. Fun stuff!)


So first what I decided to do is to prime my eyes with Rimmel London's creme shadow... I'm not to sure what this one is, it's a grey one -- anyway, I recommend you NOT do this as the look began to crease (meaning the powders started slipping into a thin line where my lid rested when my eyes were open) as I was still working on the look. Instead, I recommend using Bloom's eye base/primer (which you can buy at London Drugs) or using a matte white cream shadow (Revlon makes a really nice one from their Illuminance palette Black Magic).
Then I used these colors...

So anyway, I used the two greens in the center of the picture and used the one on the left (not the pine green one but the one that looks like a little bit of gold was mixed in as well) just on my lid with a medium shadow brush...


And then I applied the green to the right of the goldy-green everywhere else, as pictured below, with a small-medium brush...


Take note that I also applied the shadows on the lower lash line as well.
And now here comes the fun part--creating more depth! This bit is fun in my opinion because you really start to see the look come together.


As pictured above, I took that pine-green color that you see on the very left on the green section and used a small amount with the sooty-colored silver and applied that on the very outer corner of the eye with a small shadow brush.
Just for kicks, I decided to apply the sparkly white in the corner of the eye with a different small shadow brush, as well as just underneath my brow with a large fluffy brush...


As you can also see I added a light silver to the very top of the look, just to give it that gradient effect as well.
Then came the lining of the eyes and mascara! I'm pretty sure this is simple and I don't have to go into too much detail over this. Y'all know how to apply eyeliner and mascara, right?


And that's the look! I hope you guys enjoyed and if you have any requests please leave me a comment! I'll get to the look as soon as I can! Somehow I think I'm going to become the next Queen Blogging Bee. More on that later.
Have a gorgeous day! Stay gold!
- Colten.
xoxo

Labels: colorful makeup, daily, drag queen, gay, green, kim kardashian, makeup inspired, makeup look, makeup tutorial, night, party, party makeup
Sunday, December 26, 2010
Monday Makeup #1 - Smoky & Shiney 2011 New Years Makeup Look
Hiya everyone! Guess what today is? Well, depending on when you're reading this, I guess it could be any day of the week. Today is Sunday, which means that you all will have a fab look for whatever you want to wear it to! Now, I specifically designed this look so it would be perfect for New Year's, but you can wear it however you like.
Without further adieu, let's get started!

Okay, so as pictured here I've already put my liquid and cream foundation, my pressed powder, my bronzer and my blush on. Both the liquid and cream foundations, as well as the pressed powder, are by Revlon: the thin layer of liquid is Revlon's ColorStay foundation and the cream foundation, which I've applied on top of the liquid foundation, is Revlon's OneStep mineral foundation, with a foundation brush. I then applied a generous amount of Revlon's translucent powder over top of the foundation, using a bronzing brush to "stamp" the translucent powder on. I applied my Rimmel bronzer with a different bronzing brush at my temples and about an inch under my natural cheekbones, darkening the cheeks, my chin and my jaw line, and also applied it on my neck. The blush, by Hard Candy (which you buy at Walmart now), I applied on my cheekbones with a medium powder brush and the apples of my cheeks.


Next I applied my eye primer base by Bloom all over the lid, as pictured above, with using a clean, sweat-free finger. This will help to not only make the eye shadow stay on my lid longer but to also help to make the colors appear brighter and colorful.


Then, taking a small-to-medium shading brush, I applied a bright silver from my 120-color pro makeup palette which I purchased from eBay just onto the actual lid itself and just a little above the crease (which you can't see in the picture), stopping just short of the outer corner. I then applied a tiny amount of the same silver on my lower waterline.


Then I applied a silver two shades darker than the other silver I used on my lid on the outer corner with a different small-to-medium shader brush, and then taking a sooty-colored silver, I darkened the look by making an ellipse-like shape on the very outer corner of my eye and blending it just so it sat above the crease, as well as blending the color on the outer-half of my lower waterline. This will help to really give this look a smoky effect.


Next, I lightly applied a matte black with the same brush as used in the last step on top of the sooty-colored silver on the outer corner and slightly blended it into the crease line. I also blended it down onto my lower waterline.

I then lined my waterlines, both top and bottom, with a black pencil liner (pictured is Rimmel's Infallible pencil liner), as well as making the line on the outer corner of my waterline thicker. This will make your eyes seem almost narrower and looks great in photos!


Next I used Maybelline's EyeStudio gel liner, which is amazing and you must purchase it -- in my opinion it is much better than using liquid liner -- in black and using the brush provided, I applied a thick line starting from the outer corner and making it thinner as I blended it to about halfway. This will help to darken the eyes even more.


I then quickly used a large fluffy brush (such as Quo's All-Over brush) and blended the eyeshadow to soften the hard lines.


I then curled my lashes with a lash curler and applied two coats of mascara, which will help to not only make your lashes seem thicker but longer as well. I first applied Rimmel's Eye Magnifier mascara, in black, to give my lashes a good base. I did not try to make my lashes longer. I then used Maybelline's "The Falsies" VolumExpress mascara, which is very popular right now, and used that to make my lashes seem longer. If time is available, see how long you can make your lashes. I felt pressured for time during the shoot for this so I quickly applied on the mascara.
So you can totally stop here if you want, especially if you think the look is very risque for you, but seeing as how I'm a makeup wannabee (and I say that admittedly) and glitter and eye gems are very in right now, I decided to go one step further...


I sadly do not have eye gems (but you can buy some from Icing, a branch of Claire's) but I did happen to have Annabelle's liquid glitter liner available, so I applied a generous amount in the corner of my eye and joined it with the black gel liner in the middle of the eyelid. Just to give the look some sexiness. Be sure to blow dry the glitter gel first before blinking; you can use a portable fan or your blow-drier and when you lid doesn't stick to the top of your crease, you'll know that the gel has dried completely. You may have to blow dry the gel for a full 3-6 minutes, so if you'll be pressured for time, just skip this step.

And there you go! That's the look! Please leave me a comment if you liked it, or what I could do to improve my looks, and if you have any requests, feel free to "challenge" me and I'll take on the look and post it for next Monday!
Have a beautiful New Year's! Stay gold!
- Colten.
xoxo
Labels: christmas, drag queen, gay, holidays, katy perry, kim kardashian, makeup inspired, makeup look, new years